 |
| Installing the canvas pocket for the Maptech Chartkit. |
There were several purchases that I needed to make and several projects that I needed to complete in April and early May of 2016 in anticipation of the six-day shakedown cruise I would make in mid-May and the four-week cruise I would make in June and July. Some of the more important projects were the joining of the new coax cable to the fixed-mount VHF, the sewing of a canvas pocket for the Chartkit, and the carrying out of research for the purchase of a dinghy suitable for this boat. My work in this regard on
Oystercatcher, my Ericson 25, is the subject of this posting.
First, I ordered a few items from Defender, that online discount retailer in Connecticut.
I already owned four docklines - a bow line, a stern line, and two spring lines - but I wanted to have two spares. These two spares were 1/2 inch x 25 feet, the same measurements as the existing docklines.
One of my existing docklines was starting to show some wear from the constant action of the tides, currents, and wakes at the dock. Therefore, I thought it would be good to start making use of some chafing protection.
This Chafe-Pro product was well-made and easy to install. It was essentially a piece of fire hose with Velcro on it.
I wanted a second polyball for wake protection at this dock. I also wanted it for docking and for any raft-up that might occur. I pumped it up with a bicycle tire pump - something else that I had ordered, sometime earlier in the late winter or early spring.
This Polyform brand ball was size A-2, just like the other one I owned. This was just the right size for this boat - not too big, not too small.
This might seem like overkill, but it's not. Charleston, South Carolina is one of the busiest ports in the United States. There is 24/7 traffic from large, ocean-going container ships, tugs, and barges. Believe it or not, the tugs create much larger wakes than the gigantic ships.
In my earlier posting where I described my winter haulout projects, I concluded by describing my installation of the ring terminals on the ends of the new mast wires after my relaunching of the boat.
You'll recall I was pleased to see that the spreader lights worked. The steaming light/foredeck light and the anchor light, as I would discover, worked as well.
Now it was time for me to install the connector on the end of the coax cable. This would join the existing coax that I had earlier installed in the head, just beneath the through-hull fitting in the deck. This coax ran from the head to the fixed-mount GPS in the galley.
This was RG-213 coax. To it I soldered a PL-259 connector, testing for continuity with an ohmmeter along the way.
Afterwards, I melted clear, heat-shrink tubing around the base of the connector to protect the coax against water intrusion. I had done this on all the other connectors as well.
I made sure to leave plenty of slack in the cable, probably 4-5 feet total.
Now I focused on setting up the radio. Specifically, I programmed it with the MMSI (Maritime Mobile Service Identity) number that I had recently obtained for
Oystercatcher. This nine-digit number was specific to this boat. In the event that I (or someone else aboard) pressed the DSC (Digital Selective Calling) distress button on this radio, the U.S. Coast Guard would know not only the latitude and longitude of the boat, but also important information about the boat itself and the captain and likely crew.
The DSC distress button is protected by a small red shield. After I had programmed the MMSI number, I conducted a DSC distress test by means of the proper method described in the Standard Horizon manual that came with the radio. I should say that this test DOES NOT involve pressing the actual distress button. Immediately after I made the test call, I received confirmation from the Coast Guard that the DSC test signal had been received. This confirmation was not verbal in nature. It was instead an audio signal, a ringing sound, similar to the way telephones used to sound years ago.
Now that this test was complete, I began to test the radio's reception of different verbal communication channels. I was puzzled to discover that I could not hear a lot of traffic.
From the time that I had launched the boat in July 2015, I had been relying solely on a Standard Horizon handheld VHF. This radio had served me well enough in the daysailing I had done in and around Charleston Harbor. Interestingly, this small radio was receiving more verbal communications traffic than the new fixed-mount VHF with its new coax, new connectors, and new antenna over 30 feet in the air. This told me there was a problem.
Since the DSC test had been successful, my first thought was that there was something wrong with the coax cable or one of the connectors. I knew that the connector I had just installed had gotten especially hot in my soldering of it. This made me think that I had damaged it and ruined the connection. Therefore, I cut it off.
A day or two later, I returned with a new one in hand.
This time, I used my smaller soldering iron.
Now I began to test the radio once again. Sea Tow, the well-known maritime towing service, has an automated radio-check service on one of several VHF channels. I transmitted a message to the appropriate channel, and shortly afterward I received confirmation of this message. This told me that the radio was both transmitting and receiving.
Shortly afterward, however, I noticed that my handheld VHF was still receiving much more traffic than the new fixed-mount VHF. This created something of a mystery for me. Why was it that the fixed-mount VHF successfully transmitted and received a DSC test signal, and why was it that it successfully transmitted and received a verbal message to the Sea Tow test channel, but when it came to receiving normal traffic on busy channels such as Channel 16 it did not function as well as the small handheld VHF?
This made me think that I might have a bad connection in the coax cable at the top of the mast, where the cable joined the antenna. I hated the thought of hauling the boat out of the water, unstepping the mast, cutting off the connector, soldering on a new one, re-stepping the mast, and then relaunching the boat only to find out that the problem wasn't with the connector at all.
The only way I could test the radio and the coax without unstepping the mast was to purchase a Shakespeare brand Antenna/Radio Tester. I figured it was worth the money; and anyway it would be an instrument that I could use on a regular basis to determine the health of the VHF system.
The instrument was small enough to fit in the palm of my hand. That was good. The dimensions available online, which seemed quite large, were those of the package itself.
I also ordered the Shakespeare 1-Meter Cable Kit from Amazon. You need this or your need to make your own cable kit (by soldering connectors to a short piece of coax). It was cheaper just to buy this than it was to make my own.
This was RG-58 coax, a good bit smaller than the RG-213 I had used for the whole system. One day I might make my own cable kit with RG-213. That way, I can leave the tester in place and monitor the health of my system continually.
I'll skip the details of the settings on this instrument.
I'll simply say that I installed the tester between the end of the coax and the radio and conducted all three tests.

I determined that there was nothing wrong with the coax and the antenna, and there was nothing wrong with the transmission capability of the radio. I did, though, determine, that there was a problem with reception ability. This instrument thus confirmed what I had experienced firsthand. Why, though, had my earlier DSC test and my verbal test through the Sea Tow channel been successful? According to the tech department at Standard Horizon, it was likely that my radio was experiencing what is known as an "intermittent receive" issue. To make a long story short, I boxed up the radio and mailed it to California where they determined that this was indeed what was wrong. They said that the ceramic filters were bad. This was what had caused the intermittent receive issues. They replaced the filters and mailed the radio back to me. I should say that by the time I did all this on my end, and by the time they did what they needed to do on their end, it was late May or early June before I had the radio back in my hand. Thus, this project, despite being an early-spring one, stretched almost into the summer.

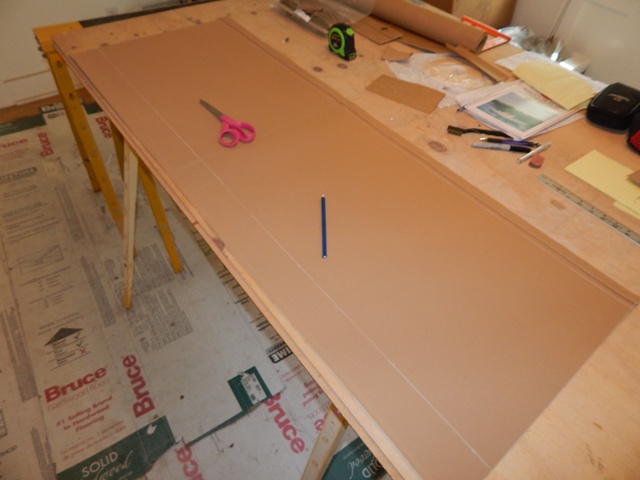
Another early-spring project was my sewing of a canvas pocket for the Maptech Chartkit that I planned to use when cruising. There was no convenient place to stow this Chartkit on this boat. This pocket, I hoped, would solve that problem.
I used Sunbrella Toast, just like I had for the other canvas projects on this boat, for example, the portlight covers and the covers for the electrical panels in the galley.
I made a major mistake when I started this project. I did not add hem-allowances to my measurements. As a result, the pocket was too small. Fortunately, I noticed this error before getting too far along. Nevertheless, I had no choice but to discard this piece of canvas and start over.
For this project, as for the others I had completed, I used my mother's old Singer sewing machine. This 328K had been manufactured in Scotland in the early 1960s. This was back when they made machines to last a lifetime - and longer. I had earlier added the labels as time-saving reminders to myself, since I didn't use this machine on a regular basis.
I had earlier ordered several yards of 54 inch Sunbrella Toast from Sailrite, that Indiana-based company with the many user-friendly videos.
There was no video for the making of a Chartkit pocket, so as was the case with so many projects on this boat, I had to figure it out for myself.
The trick was making it wide enough (but not too wide) so that the kit would fit snugly into the pocket. I also had to use my best guess for the amount of material I needed to have at the top of the pocket.
Someone at the marina who saw my finished worked wondered why I had not made the pocket large enough to accommodate the entire Chartkit. My answer was that I wanted the top of the Chartkit to project above the top of the pocket. That way it would be easier to grab the Chartkit and remove it.
All along, I had planned to install the pocket on the starboard bulkhead. During the refitting of this boat, I had deliberately left a rectangular section of this bulkhead open for this purpose.
I had also deliberately designed the main salon table to accommodate the Chartkit, whether oriented fore-to-aft or athwartship.
When the time came to install the pocket, I broke out my Sailrite brand Snaprite dies and snaps. A year earlier I had been sold on the Snaprite system by watching one of those Sailrite videos. It really is an ingenious way to install snaps. There's no way I ever could have gotten the portlight covers as tight as they were without this system. On the subject of the portlight covers, I should mention that in the spring of 2016 they were absent from the boat because I was still in the process of varnishing the mahogany trim around the portlights.
You'll recall my major mistake on my first attempt at making the pocket for the Chartkit. Well, I made another one long before this when I did not take into consideration the full size of the pocket needed to house the Chartkit. I was dismayed to discover that it was impossible for me to fit this pocket into this dedicated space on the bulkhead.
Fortunately, I found an alternative space that accommodated the pocket perfectly. Notice the small spike projecting from the base of a snap that I have partially installed on the forward side of the door. I'm about to stretch the pocket over to that spike. Once I puncture the canvas, I will use the rivet gun to install the other half of the snap to the canvas itself.
As I said, this Snaprite system, allows you to stretch the canvas nice and tight, eliminating many wrinkles and giving the job a clean, professional look, and also elimnating the need to drop big bucks for a custom job by a professional canvas worker.
Another job I tackled during the early spring was the fixing of leak in one of the portlights. Back in October 2015, here in Charleston, South Carolina, we had received 24 inches of rain as a result of Hurricane Joaquin being offshore. During those several days of torrential rainfall, water had leaked through this starboard side portlight. In the months that followed, it rained many times, but this portlight had never again leaked. Then, in the early spring of 2016, shortly after I had launched the boat, it started leaking again.
I had used six rolls of butyl tape in my refitting of
Oystercatcher, and now I had only a small amount left for miscellaneous uses such as these. Therefore, I had no choice but to order another roll. I actually ended up getting two total rolls, because this is how Maine Sail sells it.
This is the good stuff, and I've discussed it many times on this webpage. For more information and for ordering it, see the Compass Marine link on the homepage.
After I had removed the trim from the portlight, and after I had pressed on the corner where I believed the leak to have originated, I could see daylight between the aluminum flange and the fiberglass. The rest of the portlight looked good. Not wanting to remove the portlight, clean it, and rebed it with butyl tape all over again, I simply shoved a small wad of butyl tape into the crack with a screwdriver and then reinstalled the trim piece. This quick fix actually worked, and not a drop of water entered the boat afterwards, no matter how much water I sprayed onto the portlight with the hose.
Also during this time I discovered that one of the two carbon monoxide detectors was starting to malfunction. I therefore replaced it with a new one. This was the very reason why I thought it was smart to have two detectors rather than just one.
Another project of sorts concerned my research on dinghys appropriate for my needs aboard this boat. A transient cruiser, with a Coronado 27, was docked next to me, and I noticed that he had a small fiberglass dinghy. A conversation ensued, and this cruiser, who would be at this marina for another month or so, offered to let me experiment with this dinghy aboard my boat.
We placed this dinghy on the foredeck of my boat, just as he said he had placed it upon the foredeck of his boat when he transited the Erie Canal in his passage from Lake Huron to Charleston. This was a "Dink" brand dinghy, and it didn't look half bad, even sitting on the foredeck.
Also nearby was a long-time marina slip-holder, who owned a Portabote. Like the owner of The Dink, this owner allowed me to experiment with his dinghy.
The Portabote was lighter and much easier to stow on deck, but it also required some assembly before use. The question was, therefore, how often would I want to stow the dinghy on deck?
I plan to devote an entire posting to this dinghy research. Suffice it to say here that I was fortunate to have two persons nearby who were willing to help me with this research at this time.
You'll recall from my posting on my winter haulout projects that I had installed a Yeti tie-down system on the berth extension in the main salon of the boat. I had determined that this was the best place to stow the Honda EU2000 generator while underway. It was low in the boat and almost amidships.
The berth extension, of course, was designed to swing upward into its deployed position. I needed a way to make sure that it would not swing at all while this generator was strapped to it. The simplest solution was to through-bolt it to the settee locker. This was not, however, as simple as it might have seemed, unless of course I didn't mind removing the contents of the locker every time I wanted to unbolt the berth extension, which I did. At issue was the head of the hex bolt. I needed a way to avoid having to put a wrench on the head of this bolt.
Inside the settee locker I installed two plywood backing plates. Through these I drilled a hole. Then I inserted a hex-head bolt and a washer.
On the other side I installed another backing plate along with a washer and a nut. My solution was to tighten down this nut as far as possible. This would allow this bolt to remain snug in this horizontal position indefinitely. The bare plywood backing plate was not very attractive, but no one would ever see it.
After taking careful measurements, I drilled a pilot hole in the berth extension.
When it looked like this hole would line up with the bolt, I drilled out the pilot hole with a 5/8 inch bit.
Despite my careful approach, I was at first unsuccessful in my lining up of the hole with the bolt. After I had widened the hole considerably by rolling around the 5/8 inch bit, I at last obtained a good fit.
The large fender washer that I had previously purchased concealed the large hole. A wingnut held everything together. I'll say right now that this set-up was a simple and effective way to hold the berth extension in place, and I would use this twice a day when cruising.
One last project that I undertook in the early spring was the sealing of the space around the air conditioner. The previous year I had used closed-cell foam. This year I opted for felt.
This was much easier to work with, and it was more effective, since it was easier to stuff this in the many cracks and crevices. I also stuffed this into the cracks between the stainless steel companionway slides and the fiberglass lips on either side of the companionway. This did a good job in blocking the draft in this area of the boat.
Now that these early spring projects of 2016 were complete, I could focus on the upcoming shakedown cruise of six days that
Oystercatcher would make in May 2016 from Charleston to Beaufort, South Carolina and back.


No comments:
Post a Comment