 |
| The shelf-and-partition system for Oystercatcher, my Ericson 25 |
If you have read the first part of this article, then you'll know that this project within the aft-locker of the V-berth on my Ericson 25 had as its primary purpose the construction of a shelf for the installation of a vertically-mounted holding tank. You'll also know that this project had as its secondary purpose the construction, not only of an additional shelf, but also of partitions, for the sake of creating additional storage space in this rather large compartment of the boat. While the subject of the first part of this article concerned an analysis of the issues at hand, the subject of this second part of the article concerns the construction of the necessary components for this shelf-and-partition system.
The first step I made toward the construction of the necessary components was to make a few mock-ups out of cheap, left-over material and cardboard. Experience has taught me that it's worth the time to go through this mock-up process.
In the picture below, you can see that I have placed a small piece of plywood underneath the holding tank, in order to simulate the height at which the tank would sit after I installed the permanent plywood shelf, which had not, at this point, of course, been constructed.

With the holding tank temporarily situated in place, I focused on the partitions that would be located on either side of the tank. It took a lot of measuring and cutting, but eventually I was able to create a cardboard mock-up that fit sufficiently within the confines of this space. The most difficult task was determining the curvature of the hull. It was also not easy to ensure that everything was plumb and level while cutting and shaping the bottom of the mock-up to conform to that curvature. My point is this: I probably could have taken about fifteen different pictures of the measurements and the cuts that I had to make to produce the beautifully-curved and well-squared mock-up that you see in the picture below. It's obvious that by this point I was ready to cut the real thing based upon this cardboard pattern.

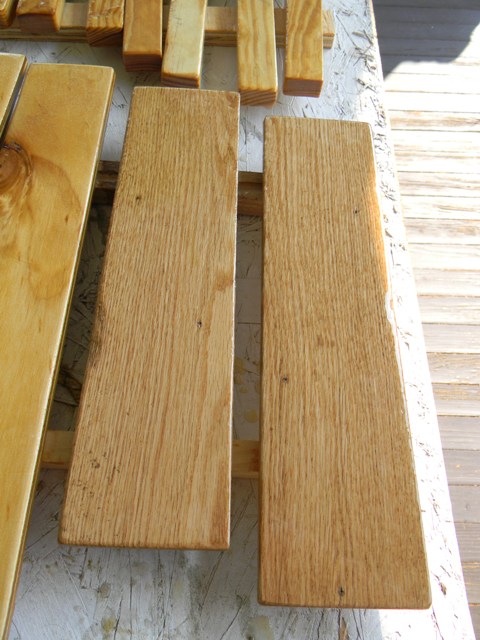
For this project, as on other projects on this boat, I used 1/2 inch, exterior-grade plywood. Also, as on other projects, I attempted to reduce weight and increase ventilation by drilling as many holes as possible.
I drilled small holes for the part of the partition that would embrace the holding tank. I drilled large holes for the part that would be exposed. I wanted these holes to be as large as possible in order to let a lot of light into the storage area between the partition and the hull.

In my zeal for bringing this partition part of the project to completion, I went ahead and painted the partitions at this point. If I had it to do all over again, I would have epoxy-coated them prior to the application of the paint. Having used a lot of Benjamin Moore, Super Spec, Oil-Based Primer on the exterior wood trim on my house, I knew that this stuff was super tough, and I figured it would offer sufficient protection to these partitions. After the fact, I spoke with a local boatbuilder who gives me advice from time to time. He told me that to be on the safe side I really should have coated the pieces with epoxy prior to the application of the primer, even if it was a good oil-based primer. As a result of his advice, I epoxy-coated every other piece of wood that I used in this project. It will be interesting to see, over time, how the partitions hold up in the marine environment compared to the other pieces of wood.

Over the primer I applied several coats of Benjamin Moore, Super Spec, Oil-Based Urethane Paint, which, according the local Benjamin Moore dealer, was more durable than regular oil-based paint. I had also read on the Cruisers Forum about a sailboat owner somewhere out West, who also happened to be the owner of a Benjamin Moore dealership. He said that he had used this very paint inside his own boat with success.
Here's how the partitions appeared at the end of the priming and painting process.
If it looks like it was difficult to dry-fit these various pieces together, it was, and this was when things were nice and simple.
Next, I turned my attention to constructing the shelf that would support the holding tank.
I beveled the edges of the shelf as you see in the picture below. The bevel on the bottom was meant to mimic the rise of the hull, so that it would conform to its shape rather than butt harshly into it. The bevel on the top was meant to provide plenty of space for the application of thickened epoxy. Here, I planned to lay a fillet before I laid the first piece of cloth that would bond the shelf to the hull.
At this point, the shelf was finished, save for the epoxy coating that I would later give it for the sake of protection.
The next step I needed to take involved the construction of the cleats that would support the shelf. I had made some mock-ups out of pine. Now I needed to make the real things out of something more rot-resistant. For this, I turned to Douglas fir. This wood might be common in some other parts of the country, but it is not very common at all down here in South Carolina. Fortunately, I found just the right amount that I needed (for this and a few other projects) at Buck Lumber here in Charleston. There were only about three pieces left, and they weren't planning on stocking any more of it.


Back at home, I made the necessary cuts to create these cleats. It's hard to tell from the picture below, but I had to make several cuts at several different angles. It took a lot of trial-and-error to produce the mock-ups. For some reason, I never took pictures. If I had been really diligent in the picture-taking, you would have seen me climbing up and down the ladder into the boat and walking back and forth to the table saw, over and over and over again. But then again, I could say the same thing about damn near everything I have ever done on this boat. Making these cuts on the good wood you see below - the Douglas fir - were really quite easy, after I'd done the hard work of making the mock-ups.

Satisfied with the shelf and the cleats, I did another dry-fit and then began to focus on the next step. It really seemed to me that I needed some sort of plywood piece to go up against the forward side of the holding tank, i.e., the side that is here pictured. I knew that after I had glassed the cleats to the hull and then glassed the shelf to the cleats and the hull, I would need to secure the holding tank in some way to the shelf. My plan was to use galvanized steel straps, but I still needed to figure out some way to secure the straps themselves. I couldn't really use the shelf as a means to secure the straps, because the holding tank occupied all of the space on the shelf. This is why I started thinking that I needed some sort of piece of plywood on the forward side of the tank. I figured that this would be something solid to which I could fasten the straps.
With this in mind, I cut a piece of plywood to the appropriate size.
As was the case with the partitions, I drilled numerous large holes in order to reduce the weight. I also wanted to be able to see the waste inside of the tank through these holes.
In case you're not familiar with this technique, I'll describe it here. When you use a large paddle-bit, like the one in the picture, you will very likely experience what's called "tear-out" on the opposite side of the plywood, if you drill all the way through the wood without stopping. It's better to drill down into one side until the pilot bit of the paddle penetrates the other side.
It's at this point that you should flip the wood over. Using the small holes made by the pilot bit as a guide, you then drill through this side until you meet up with the large hole that your started on the first side.
This creates nice, clean holes with minimal tear-out.
Presto. All done, and ready for fitting.

Next, I needed to figure out what to do with the large, sloping space that was forward of the holding tank. As I said in Part I of this article, I planed to install an Airmar B60-12, bronze, through-hull transducer in the existing hole forward of the holding tank. You can see this hole at the bottom of the picture. There is a piece of black plastic conduit that is partially obscuring it here. I was a little worried that if I did not construct some sort of secondary shelf over the top of this transducer, then anything that I might store in this relatively large space might damage it in the inevitable movement that accompanies sailing in anything except the most placid conditions. I was also concerned that any water that drained downward from the chain locker through this space on its way to the bilge would damage anything but the most water-proof materials that I placed in this space. Therefore, I decided to begin to make some mock-up cleats out of pine, in order to see if I could figure out a way to make this secondary shelf idea a reality.

As was the case with the mock-ups for the little cleats that were to support the holding tank shelf, these mock-ups for the secondary shelf required many trips back and forth from the boat to the miter saw and table saw.
Below you see two different mock-up cleats of pine that I used in the decision-making process. It's difficult to tell from this picture, but there were many angles that had to be taken into consideration.
Before I went so far as to cut the real cleats out of Douglas fir, I decided it would be a good idea to cut the shelf and dry-fit it into place.
I again used 1/2 inch exterior grade plywood, just like I had for the partitions.
Due to the 12 degree deadrise of the hull, it was not possible for me to achieve a level position for the shelf in terms of its fore and aft orientation. I could, however, achieve a level position in terms of its port and starboard orientation. In the picture below you see the spirit level that I used for this purpose.
Satisfied with the dry-fit of the shelf, I turned my attention to the cutting of the cleats out of Douglas fir. I started with 2 x 6 material.
I cross-cut this material into two equal parts on the miter saw.
Then, I took the two pieces to the table saw to make the angled cuts that would allow them to conform to the angle of the hull, port and starboard.
After I had put bevels in both cleats, I used a jig saw to rip each of the pieces at a 12 degree angle along the topside. This angle compensated for the 12 degree deadrise of the hull. In the picture below, the topside is the side that is flush with the fence of the miter saw. The bottom side, which is beveled, is the side facing you, the viewer. I did not take a picture of my 12 degree angled cut with the jig saw. The picture below actually illustrates the next step that I took - the cutting of the aft end of the cleat. The reason for this cut will become more clear when you see the cleat in place inside the boat.
When I completed the necessary cuts, I took the cleats outside for some pictures in the sunlight. This light made the bevels of the cleats more recognizable.
Here, I have oriented the cleats in a way that mimics the orientation they would have when installed in the boat. The small ends face forward. The large ends face aft.
Next, I dry-fitted the cleats and found them to be well-leveled, port to starboard. You should also be able to see now why it was necessary for me to make those angled cuts on the aft end of the cleats with the miter saw. Without them, the aft end of the cleats would not have seated properly against the holding tank.
During this dry-fitting process, I noticed a problem. The piece of plywood that I had made to fit on the forward side of the holding tank (to secure the galvanized straps for the tank) simply would not fit on the shelf I had already made for the purpose of supporting the holding tank. Notice that this piece of unfinished plywood is resting against the hull. It should be several inches up from the hull, sitting on the edge of the holding tank shelf.

The problem was that I had built the shelf before I had realized that I would need to have that piece of plywood on the forward side of the holding tank for the purpose of securing the galvanized straps. I had, therefore, built the shelf to the dimensions of the holding tank, and I had not allotted any space for this piece of plywood that would need to sit along the edge of the shelf. Now conscious of this problem, I had no choice but to discard the original shelf and build a new one with a small lip that would accommodate the piece of plywood. Below you see the original shelf on top and the new shelf (with the little lip) on the bottom.
With the new shelf in hand, I returned to the boat for yet another dry-fit. Below you can see the little lip now protruding from the bottom side of the holding tank.
Now the piece of plywood on the forward side of the holding tank fit just right.
Likewise, the cleats fit well in this new set-up.
I next needed to construct the remaining components of the galvanized strap retention system that I had envisioned for firmly securing the holding tank to the shelf. My plan was to have 1 x 3 or 1 x 4 battens on the face of the plywood. These battens would serve as anchor points into which I could screw the galvanized straps. I had some scrap pieces of oak, so I decided to use these for this purpose. First, I thought it important to use the router to round over all four sides of these boards in order to make their edges less likely to create snags for any equipment I might want to store in this compartment.
I also thought it would be good to rout the boards lengthwise in a dado style cut in order to allow the galvanized straps to be seated more securely. I marked the boards in preparation for the shallow cuts I would make with the table saw. This would require multiple passes, since I would be using a normal blade, not dado blades.
After I finished the cuts, I decided to try out the galvanized straps.
They fit just right.
Now I had to go back to the large shelf (that I had already cut) and cut some notches for the purpose of accommodating these oak battens.
Looked like a winning plan. You can see that the notches in the oak battens also would allow the galvanized straps to pass between the oak battens and the shelf. That was another reason why I had decided that the dado-style cuts in the oak battens were a necessity.
Next I decided it would be good to drill as many holes as possible in this shelf. This would make it lighter in weight, and it would allow for better ventilation.
I didn't drill the holes all the way through the board. I stopped just shy of the other side.
Then I flipped the board over and drilled on that side.
This technique took more time, but it resulted in nice, clean holes with minimal tear-out. This would make for easier work when it came time to apply coats of epoxy.
The finished shelf, minus the epoxy.
Then it was time for another trip out to the boat for some more dry-fitting.
Satisfied with the dry-fit, I spread wood-filler over some of the divots in the plywood in preparation for the epoxy-coating that I would soon do.
As a part of this prep-work, I also did a little more work on the Douglas fir cleats. I thought it would be a good idea to round-over the topside of the cleats. This would enable me to wrap cloth over the top of the cleats when the time came for me to glue them to the hull of the boat with epoxy.
It was also necessary for me to soften-up the edges of the battens - you know the battens that would serve to keep the holding tank off of the screws that protruded from the bulkhead.
Additionally, I cut some cleats out of southern yellow pine that would help to secure the partitions to the bulkheads, foreword and aft.
When I had completed all of these steps, it was at last time to turn to the epoxy work that would help to protect all of this wood from the elements. For this, I used RAKA 127 Low-Viscosity Resin and 350 Non-Blushing Hardener.
I decided that some of the pieces needed more than just clear-coat applications of epoxy. For example, I thought it would be smart to include fiberglass cloth on the holding tank shelf for the sake of increasing its strength.
I also applied cloth to the large storage shelf. This was where I planned to store my spare anchor and anchor chain.
Everything else I simply clear-coated.
After everything had gotten two coats of epoxy, I turned it all over for the purpose of applying two coats to the other side.
Due to the warm weather and the curing-properties of the 350 hardener, I was able to apply both coats of epoxy to one side of the pieces in one day, and I was able to apply both coats of epoxy to the other side the next day. As I have said in other articles, I like to take lots of pictures to remind myself of just how much work all of this took. Sure, I was able to do all of this epoxy work in two days time, but it was tedious and time-consuming.
Several days later I turned my attention to that most dreaded of tasks - the sanding of the epoxy. It was mind-numbingly repetitive work, but somebody had to do it, and I was the only somebody I could find.
With all of the components of this shelf-and-partition system having been cut, dry-fitted, epoxy-coated, and sanded, I had reached a milestone. It was now time to begin installing all of the components in the aft-locker of the V-berth. Before I could begin those installations, however, I would need to fill a hole in the hull where the old knotmeter used to be. At the same time, I needed to glue the Douglas fir cleats to the hull with thickened epoxy and fiberglass cloth. These tasks are the subject of the third part of this four-part article on this shelf-and-partition system that I built to house my holding tank in the aft-locker of the V-berth of my Ericson 25.


No comments:
Post a Comment